Navigating Adhered Masonry Veneer

Words: Dan KamysOctober 2015

Pavers, Thin Brick and Stone, and Thin Veneer

By Steven Fechino

Images courtesy of Spec Mix adhered masonry veneer An adhered masonry veneer is a cost-effective way for a home owner or commercial property owner to keep the appearance of masonry in the façade, when budgets or design considerations don’t allow the use of full-sized masonry units. Masons do not like anything that takes away from the traditional brick- or stone-laying they are accustomed to. But, over the last 10 years or so, adhered masonry veneers have become better engineered for performance and more attractive as a final product. Many masons have learned to install these veneers as a way to secure a contract or to make a little extra money on the side. Here are a few lessons learned by a guy whose first adhered masonry veneer job was a poorly understood, planned and managed mess.

Product to Watch

Hillcrest Stone Thin Veneer

Hillcrest Stone Thin VeneerHillcrest Stone Thin Veneer can be used for both interior and exterior applications. It has a tight dimensional tolerance and doesn’t require a footing, making installation fast and easy.  Color is integrated throughout each unit, and texture emulates the look and feel of natural stone. This product offers a lightweight veneer option. The ASTM C170 Compressive Strength averages 5,000 psi. The ASTM C140 Density averages 104.5 lbs./ft3 density. The ASTM C140 Absorption average is 5.9 percent, and the ASTM C666 Freeze-Thaw Resistance is less than 3 percent loss. This product offers an aesthetic and modular system that emulates stacked stone.For more information, visit http://artisanveneers.com/products/hillcrest-stone-thin-veneer.
Every project is specific, with an individual set of materials and conditions that affect the job’s outcome, including the veneer, mortar, drainage mat, fasteners, lath, substrates, climate and the skill level of the installers. In some cases you have a designer who is coordinating the project from the substrate out, while in other cases, it is up to the installer to give the owner recommendations. For standards and design details, the National Concrete Masonry Association (NCMA) represents the concrete industry, and the Masonry Veneer Manufacturers Association (MVMA) represents the manufacturers and suppliers of adhered masonry products. The MVMA offers a free design and installation guide at https://ncma.org.   The International Building Codes (IBC) refers to an adhered masonry system as “Adhered Masonry Veneer.” International Code Compliance (ICC-ES) refers to the system as “Precast Stone Veneer.” I always called the installation of veneer products “lick and stick,” but they all refer to the same thing. There are a few things we need to understand about adhered masonry that will point us in the right direction.
  • Adhered masonry is not loadbearing.
  • Never laminate adhered masonry to existing or damaged EIFS or stucco, due to the unknown integrity of the existing fasteners, lath and substrate. Adhered veneers can be applied in new or retrofit work, when the structural integrity of the wall is reconstructed and within design tolerances to support the eccentric load on the structure.
  • Do not install products that are dirty, too wet, too dry or frozen.
  • Make sure the substrate is suitably designed for the veneer loads; drainage is considered and properly sealed and flashed; mortar is properly selected for the installation; and lath and anchors will properly attach the veneer.
  • Never pressure wash the veneer; it is not an option, ever.
Veneer installation is based on recommendations of the specific product and system chosen for your project. With that in mind, I will discuss a basic installation using standard building techniques that can help you in your next project.

Weep screed

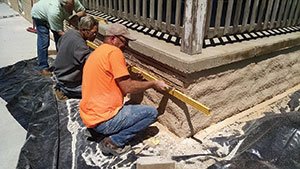
The purpose of the weep screed is to provide drainage for the system. It is typically galvanized metal or a durable plastic strip that is placed at the base of the wall and, in some cases, at each floor level of a large veneer. The galvanized weep screed must be at least 26 gauge – or 0.018 inches – thick. The plastic weep screed must be a minimum 0.05 inches thick, and both products must extend up the wall a minimum of 3.5 inches and fastened to a stud in frame construction or directly to the concrete or concrete masonry unit (CMU) substrate. To function properly, weep screeds should be a minimum of four inches above grade and two inches above a roof line. If applying veneer to a CMU or cast-in-place grade or foundation wall, the minimum tolerance is two inches from a sidewalk or driveway surface. This placement will reduce the possibility of the weeps becoming clogged with debris that splashes on the wall. Attach your weep screed prior to placing the weather resistant barrier (WRB) on your project because it is easier to install the overlap when the weep screed is in place. Many building code officials have become more rigid on the enforcement of these standards in recent years. [caption id="attachment_11239" align="alignleft" width="300"]The adhered masonry veneer unit is being placed on the scratch coat with a slight twist of the unit. The adhered masonry veneer unit is being placed on the scratch coat with a slight twist of the unit.[/caption]

Weather resistant barrier

The WRB sheds the moisture that passes through the veneer away from the substrate and allows drainage to the weep screed or flashings. Two individual layers of house wrap or building felt sealed with tape surrounding the structure are typically required. When a drainage mat is used directly against the lath as part of the wall system, one layer of WRB is eliminated (check local codes). When a drainage mat is used, air and moisture can move with significantly less resistance behind the veneer, and the wall is usually dryer than one without a drainage mat. The WRB is installed after the weep screed is in place, and must drape over the weep screed to allow moisture to be channeled past the face of the wall. adhered masonry veneer These WRB tips will give you better results:
  • Install the WRB from the base of the building up, in a shingled fashion.
  • Install the WRB in two separate applications when wrapping a structure to provide the required two layers of WRB.
  • Horizontal laps for WRB should be a minimum of two inches, and vertical laps a minimum of six inches.
  • Both layers of WRB terminations at the inside and outside corners must extend a minimum of 16 inches in both directions beyond the corners.
  • No. 15 building felt is not the same product as 15-pound felt, which is used for roofing, so make sure you are using the correct product for the proper application.

Continuous insulation

Continuous insulation, or rigid insulation, has become increasingly popular, and the installation of adhered masonry veneers on the exterior side of the insulation is allowed as a non-engineered system for insulation that is ½-inch thick or less. Designs using insulation greater than ½-inch thick require an engineered anchoring system. Specialty washers for anchoring lath over rigid insulation are available where you purchase your insulation or from the rigid insulation manufacturers. There are several options, and the manufacturers can easily guide you in the right direction when specifying or constructing a project with the thicker insulation. Continuous insulation, when placed as the outermost layer on the structure prior to lath installation, can eliminate the need for a second layer of WRB. The inner layer of WRB must have all of the joints sealed and taped for the system to work properly. Drainage mats or drainage planes, typically made of a high-loft, non-woven mesh or an entangled mesh, can also serve as a replacement for the second layer of WRB. The inner WRB must have all joints sealed and taped. Drainage mats are not a substitute for the lath or lath systems.

Fasteners

Adhered masonry veneers can be applied to concrete, concrete masonry unit, steel stud and wood stud substrates. The allowable non-corrosive or corrosion-resistant anchors used for anchoring lath or lath systems are as follows:
  • Wood frame: Staples, roofing nails and screws can all be used. The minimum embedment is ¾-inch, but a minimum of one inch is a good practice to follow.
  • Steel stud: The only anchor recommended for steel stud is the self-tapping screw or hex head anchor with a neoprene washer attached to the anchor. Minimum embedment is 3/8-inch, but again, a greater depth will increase your odds of success.
  • Concrete or concrete masonry units: Powder actuated fasteners, also known as cap anchors, are allowable for this installation. Powder actuated anchors do not need pilot holes, but are not that commonly used. Concrete masonry screws are a good choice as they can be monitored for embedment; will not blow through the substrate; and are typically more economical.
Innovations in lath during the last several years have opened the market to different ideas, when thinking about the lath that is integral to adhered masonry systems.

In The News

Techo-Bloc Acquires Two Manufacturing Facilities in Midwest

Techo-BlocTecho-Bloc, a paving stone company, has acquired two new manufacturing facilities and a distribution depot, allowing a Midwest presence. These initiatives will further the company’s distribution network to Minnesota, Wisconsin, Iowa, Illinois, Michigan, Indiana, Ohio, Kentucky, Missouri, Nebraska and Tennessee.Techo-Bloc produces Borealis outdoor slabs, steps and walls made from concrete, but with a look and feel exactly like wood. The company’s Travertina slabs offer the look of natural travertine without the fragile characteristics of its natural stone equivalent. Every Techo-Bloc product is manufactured to withstand the freeze-thaw effect that occurs in ever-changing climates. The pavers are nearly three times stronger than poured concrete, having a minimum compressive strength of 8,000 psi and a maximum of 5 percent water absorption. While Techo-Bloc does not sell directly to the public, the company is currently building a distribution network through independent retailers to service contractor and homeowner sales.

Metal lath

Metal Lath is manufactured by several outstanding domestic manufacturers. Metal lath used today is a galvanized, self-furring, dimpled product that allows the lath to project ¼-inch out from the substrate, so the base or scratch coat mortar can fully encapsulate the lath. Lath weight is expressed in pounds per square yard, and is offered in three different weights: 1.75 pounds, 2.5 pounds and 3.4 pounds. The most common is 2.5, but there are some areas where all of the specifications are written for 3.4 material. Lath placement or orientation is no longer stipulated by local codes. It is still most productive to install lath horizontally – one over two for example – and the days of “cups up, smooth down” have been eliminated. Do not terminate lath at a corner. Always extend the lath past an outside corner a minimum of 12 inches. Lath can be terminated at an inside corner. Anchor lath a minimum of every seven inches vertically, and at every stud or 16 inches on center. [caption id="attachment_11240" align="alignright" width="300"]Shown in this picture is the placing of mortar by “buttering” the back of the adhered masonry veneer unit. Shown in this picture is the placing of mortar by “buttering” the back of the adhered masonry veneer unit.[/caption]

Non-ferrous lath

Non-ferrous lath is a lightweight alternative to metal laths and lath systems. The product utilizes a fiberglass woven mesh attached to horizontal foam strips that outline the fastening locations and provide a self-seal to all of the fastener penetrations. The foam strip places the mesh far enough from the wall to allow mortar encapsulation. The product is significantly lighter weight than metal lath at 20 pounds per 300 square feet, or 0.60 pounds per square yard.

Case Study: Exterior Tile Replacement

Restoring San Antonio’s Broadway Bank

Broadway-BanWhen San Antonio, Texas-based Broadway Bank owners say, "We’re here for good," they mean it. In a display of commitment to their community, the bank owners embarked on a major project to preserve the iconic bank building at the corner of Nacogdoches and Loop 410.The building's 46-year-old quartz and marble exterior had become cracked, damaged and weathered with time, so Broadway Bank’s owners turned to Western Specialty Contractors – San Antonio, Texas, branch (formerly Western Waterproofing Co.) to return the façade to its original luster. Western crews were charged with removing sealants in all of the building's exterior joints and replacing them with new silicone sealants, plus removing all of the building's worn exterior quartz tiles and replacing them with new ones. It was vital to the success of the project that the new quartz tiles match the facade of the bank's adjacent high-rise administration building. The bank's owners had quartz tile from the Himalayas installed on the administration building when it was constructed to closely match the existing bank building. Three years later, the owners decided to replace all of the exterior tiles on the original building with tiles to match the new administration building. Western Waterproofing located and used the same quarry in the Himalayas, where the bank had ordered quartz tiles for the administration building three years ago. The quartz tiles were cut into 2.5- X 8-inch pieces, adhered onto CMU walls with Laticrete thin set, and then grouted. Western crews installed 14,796 square feet of quartz tiles, weighing about 51,446 pounds on the building's facade. Western crews completed the job by chemically cleaning and pressure washing all of the bank's exterior marble panels to a like-new appearance, while all of the exterior windows were resealed using silicone caulking. The general contractor on the project was Malitz Construction, and the architect was Garza Bomberger & Associates, both of San Antonio, Texas. For more information, visit www.westernspecialtycontractors.com.

Installation techniques

Installation methods for adhered masonry veneers vary among installers, but the goal is the same: a long-lasting end result. I have seen tricks and techniques that make sense and some that make a real difference in the end result. Here are a few of the lessons I’ve learned:
  • Know how square your work area is. When laying out for corners, the time to make adjustments is when you are installing the lath and before you begin veneer installation.
  • If working on an exterior veneer against a sidewalk or a patio that slopes, always level your work. When possible, install from the top of wall down to place the veneer cuts at the floor level.
  • When installing lath against framing, mark your stud locations to ensure that the person anchoring the lath can attach the anchors directly into the structural member.
  • When installing adhered masonry veneers over sheets of plywood or Oriented Strand Board (OSB), make sure there is a minimum 1/8-inch gap between the sheet edges to allow thermal and moisture material dimension changes. If installed with the edges touching, the sheets can buckle and pop the veneer off at a later date.
  • Always inspect the WRB and weep screed prior to beginning your work, and repair any loose edges or penetrations before you mix your mortar.
  • When applying the base coat on lath that has been in direct sunlight and is hot to the touch, use a spray bottle to cool the metal before applying the mortar.
  • Spot measure the depth or thickness of your base coat and make sure it is ½-inch thick or slightly greater.
  • On windy days when you complete your base coat application, cover your work with plastic to slow evaporation and allow proper mortar drying.
  • On high-temperature days, mist the base coat during drying to reduce cracking and help the mortar cure to the proper strength.
  • Scratch level horizontal and plumb vertical lines in your base coat - even though the lines will be covered by the top coat, they can serve as a reference for aligning the application of veneer material in areas where the top coat has not yet been applied.
  • When mixing the base or top coat of mortar, mix mortar for three minutes, let it sit for about three minutes, and then continuing mixing for an additional three minutes to allow the mortar to become more workable and exhibit a longer board life.
  • Admixtures need to be kept from freezing and out of direct sunlight prior to use for best performance.
  • Install your corners as early in the installation as possible. If you have to cut the veneer to make bond, install the cut pieces as far from the corners as possible within the veneer to hide the cuts.
  • Lay out your veneer from several boxes of material before you begin installation. Blending materials from several boxes will minimize any color variances in the manufactured veneer.
  • There are two ways of setting veneer units. Apply a thin layer of topcoat over the base coat and place a ½-inch back-butter on each individual unit prior to placing, or back-butter only with a ½-inch thick spread on individual units.
  • Total base coat and top coat must be a minimum of one inch thick from the outer surface of the WRB to the back of the veneer unit.
  • Push and slightly rotate each veneer unit back and forth to create a secure bond between the unit and the substrate.
  • When possible, install units from the top of your work to the bottom, which will reduce mortar droppings on finished work and make clean up faster and easier.
  • Install cut and smaller sized units at the weep screed where they will be less visible.
  • Never mess with wet mortar droppings. Let them dry out before removing them with a horse hair brush.
  • Never use masonry cleaners, wire brushes or pressure washers when cleaning adhered masonry walls.
  • Always turn your scaffold walk boards up at night to avoid staining from rain shower splatter.
  • Grout your joints once initial set has occurred using a tuck pointer and hawk or a half-filled grout bag, which (you will achieve more with less) is easier to control in tighter applications.
  • In areas where snow from parking lot plowing accumulates against a veneer installation, protect the adhered veneers from contacting the snow. Deicing salts can quickly damage the appearance of the veneer units.
  • Adjust water sprinklers so they do not spray the veneers.

Product Watch

StoneCoat Hydraulic Limestone Veneer

StoneCoat Hydraulic Limestone VeneerStoneCoat, a new hydraulic limestone application system, is a mixture of limestone and other natural materials. It is an architecturally certified product that can be blown onto almost any surface, where it then can be handcrafted, shaped and colored in a variety of ways. This recreates the look of flagstone, cut or quarried stone, river rock, brick or slate.StoneCoat is a material that has been used in Europe for decades. The base materials come from just two quarries in Europe and cannot be duplicated in the United States. The materials have been available in the U.S. for only eight years. During this time, the technology has been most prevalent in the South and is now being marketed in the northern states, but not extensively.  

The process

StoneCoat is a natural, hydraulic limestone that is crushed, mixed with a proprietary binder and spray applied to any surface (other than vinyl, aluminum or steel siding) and hand carved to match any stone, brick, block or river rock design you can imagine. This quarried stone is crushed to a powder, and then re-bonded with water. The mixture is next applied to a surface where the water evaporates and the mix absorbs carbon dioxide. The results create a solid and strong limestone masonry veneer that is vapor permeable, breathable, and resistant to bacteria, salts and chlorine. The mixture can be applied to dry wall, rough coat, wood over lath, brick, cinder block, plywood (OSB) and even ceilings. Carving designs into the mixture takes place during the drying period, which is between six and nine hours. You can enhance the look by adding color: olive, natural, black, gold, red, and a variety of browns – light, medium, chocolate and dark. The temperature for installing StoneCoat must be 40 degrees or higher, and the final hardening and curing process takes 28 days.

The benefits

StoneCoat takes less time to install than cut or quarried stone and brick, at a rate of 600 to 800 square feet per day. It is lightweight at 6 pounds per square foot, making it less restrictive and less labor intensive than traditional brick and stone. It is self-supporting and does not require a brick ledge or a footing. StoneCoat is environmentally friendly; it breathes, is mold resistant, and absorbs carbon dioxide. The product is real stone, not manufactured, faux or cement based. It is 95 percent limestone (CaCO3) with a 5 percent additive that allows the product to retain the correct moisture, adhere to surfaces, and cure quickly. It is not designed to support structures or recommended for floorings with heavy foot traffic, and it is warrantied for the life of the structure to which it is applied. Northwest Ohio Masonry and Stone has the exclusive dealership for StoneCoat in Ohio and Southern Michigan. For more information, email tech@masonryandstone.com.

Sources for information and reference

Over the years, I have had many conversations with manufacturers and sales professionals who like to drop association acronyms, council names and specific tests that relate to their products. If I did not have a copy of what they were discussing, I had to assume what they were telling me mattered. To help you understand these terms, here is a quick summary of the councils, associations and ASTMs that relate directly to adhered masonry veneers.

Associations and councils

  • Masonry Veneer Manufacturers Association (MVMA) offers guidance in the application and design of adhered manufactured stone veneers. Their manual is “Installation Guide and Detailing Options for Compliance with ASTM C 1780,” 4th edition, 2nd printing.
  • National Concrete Masonry Association (NCMA) represents concrete manufacturers and distributors.
  • International Code Council (ICC-ES) offers acceptance criteria for industry products through evaluation and testing.
  • International Building Code (IBC) is the governing code that recognizes the minimum requirements of a building product. The IBC does not govern single-family townhomes up to three stories, single-family or duplex construction.
[caption id="attachment_11242" align="alignleft" width="300"]Mortar is being applied to an adhered masonry unit before placement. Mortar is being applied to an adhered masonry unit before placement.[/caption]

ASTMs

  • ASTM C270 Standard Specification for Mortar for Unit Masonry. This standard specification is the basis for determining the properties and testing of your mortar used in reinforced and non-reinforced construction of unit masonry. This standard breaks down the material to two classifications: proportional specification and property specifications. Mortars that fit in this standard would be considered a conventional mortar.
  • ASTM C847 Standard Specification for Metal Lath. This standard specification is for manufacturing of lath when used with portland cement and plaster-adhered masonry veneers. The standard discusses the different types of laths available, both with and without backing materials directly attached to the lath.
  • ASTM C1059/C1059M Standard Specification for Latex Agents for Bonding Fresh to Hardened Concrete. The Standard discusses the application of latex bonding agents for applications far beyond adhered masonry veneers. However, this outlines the application by brush, broom and spray when placing new concrete against hardened concrete such as the top coat to base coat joint. This is for the external use of latex modifiers where admixtures will be outlined in C1384.
  • ASTM C1063 Standard Specification for Installation of Lathing and Furring to Receive Interior and Exterior Portland Cement-Based Plaster. This standard is broad to the industry referring to suspended ceilings, hangers and runners attachments, nails, screws and weep screed placements. It is especially useful in the dos and don’ts of lath placement and attachments.
  • ASTM C1384 Standard Specification for Installation of Lathing and Furring to Receive Interior and Exterior Portland Cement-Based Plaster. This standard specification discusses the additives or admixtures that are combined with conventional mortar to enhance one or more properties. The properties that are affected by the admixtures range from bond strength, workability and rate of water retention and absorption to list the few that directly relate to adhered masonry. Most admixtures today are pre-blended at the manufacturing plant to ensure consistency in all aspects of performance.
  • ASTM C1670 Standard Specification for Installation of Lathing and Furring to Receive Interior and Exterior Portland Cement-Based Plaster. This standard is important for consistency and quality in manufacturing the cementitious stone veneer units. This specification addresses the mix matrixes, tolerances, durability, finishes and admixtures that make up the stone masonry veneer units.
  • ASTM 1714/C1714M Standard Specification for Installation of Lathing and Furring to Receive Interior and Exterior Portland Cement-Based Plaster. This addresses the rigid measures used to maintain consistent ratios used in mortars that fall into the category of ASTM C270. Masonry mortars discussed in this standard are pre-blended at a manufacturing plant as a method for maintaining quality and consistent performance in the test results.
  • ASTM C1780 Revision of C1780 - 13 Standard Practice for Installation Methods for Adhered Manufactured Stone Masonry Veneer. This standard  has equal value to the manufacturers, designers and contractors that work in adhered masonry veneers. This specification covers a list of definitions that really pertain to the installation of the veneers, placements of the substrate backer board and preparation, different types of lath, installation of the cementitious base and top coat as well as placement of materials. This standard addresses many of the problems that could occur in the field application.

Steven Fechino has a Bachelor of Science in Civil Engineering Technology and has worked in the masonry industry for 32 years. He has worked with masonry restoration, precast erection, new construction, site segmental masonry and adhered masonry veneers. Fechino serves as a sub-committee member of ASTM C15, and is a subject matter expert for masonry NCCER text. He currently works as Engineering and Construction Manager for Mortar Net Solutions.
Dutch Quality StoneTM debuts first brick profile, Handformed Brick™, in three colorways including the new Snowpack™

Westlake Royal Building ProductsTM (“Westlake Royal”), a Westlake company (NYSE:WLK) announces Handformed Brick™, a new, elevated tumbled brick profile from Dutch Quality Stone, available in three colorways including the newest addition, Snowpack™, a sere

Pinnacle and Tucker Design Awards to Combine in 2025

The Natural Stone Institute is pleased to announce that beginning with the 2025 Call for Entries, the Tucker Design Awards will be partnered with the Pinnacle Awards program. Both awards will be given annually beginning in 2026. This streamlined approach

Brick Remains Top Choice Among Architects & Homeowners, Glen-Gery Survey Reveals

In advance of National Architecture Day on November 1, 2024, Glen-Gery, a premier brick manufacturer that is part of Brickworks North America, released “Trends in Design and Renovation: A Comparative Study Among Homeowners and Architects,” a national surv

Strengthening the Foundation: Recruitment Strategies for Masonry Companies Amid Employee Shortages

In today’s construction landscape, masonry companies are facing an increasingly pressing challenge: the shortage of skilled labor. This shortage is not just a minor inconvenience but a significant hurdle that threatens the industry's growth and sustainabi

About: Featured